Quick & Easy WordPress Blog Posting Guide

By Scott Riley
If you are a registered user who has been assigned an author, editor or administrator role, you will have access to the backend dashboard where you can write and publish posts on your WordPress Blog. Sign into your wp-admin dashboard. Once there, follow the instructions below to post content and media. The screenshots may not look exactly like your dashboard, because they are from the administrator panel, but the post and media insertion functions are the same.
Follow these 10 easy steps:
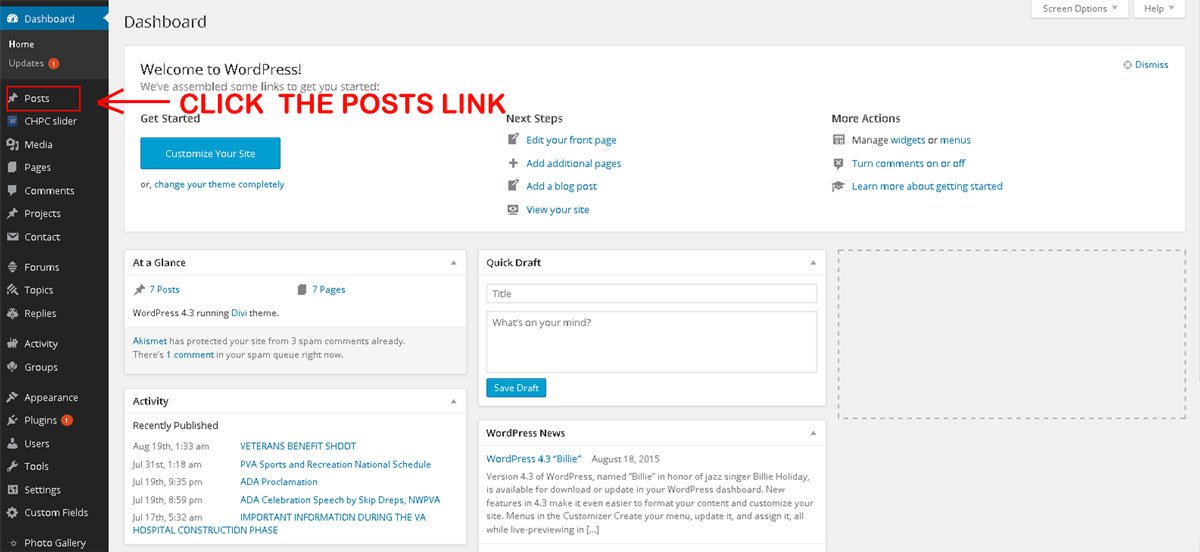
- On the left side is a black column with icons followed by the names of links to various functions. Click the one that says “Posts” near the top of the column.
- When the Posts page displays, click the link at the top left, next to “Posts” that says, “Add New”.

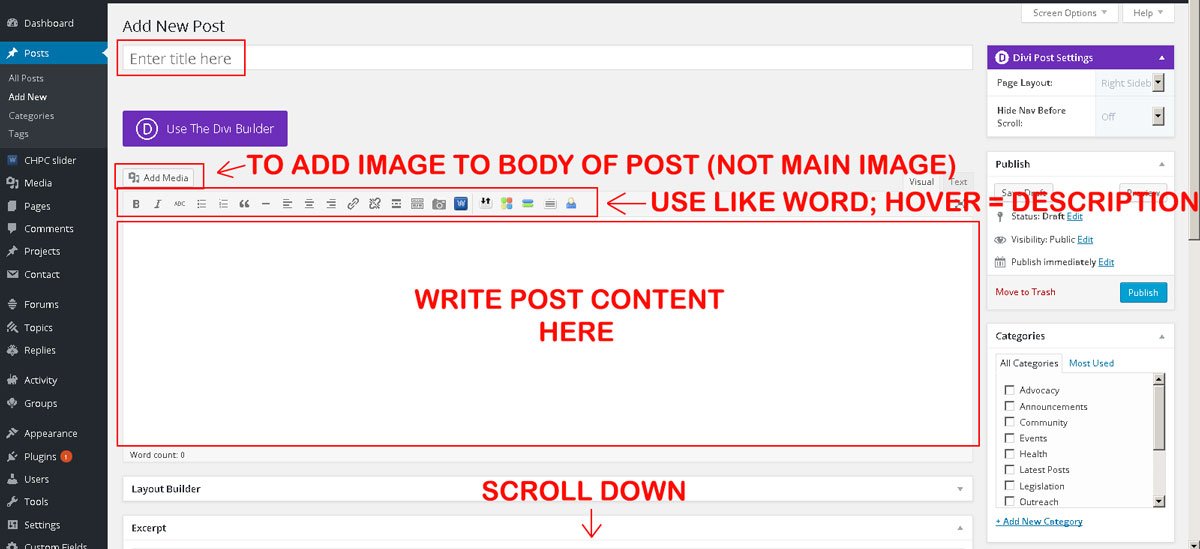
- A page title, “Add New Post” will display. Click the “Visual” link on the top right of the panel to display a more “user-friendly” screen.

- When that display opens you can begin writing your post. Add a title (it will display in large type at the top of the post) in the top left bar that says, “Enter title here”. The “Add Media” button below the “Use Divi Builder” button is for adding media to the body of the post. It’s not the main image. The main image is posted with the “Featured Image” button and will be described in the next step. You can use the icons at the top of the panel to style your text and write post content in the large empty space. Scroll down for additional features.
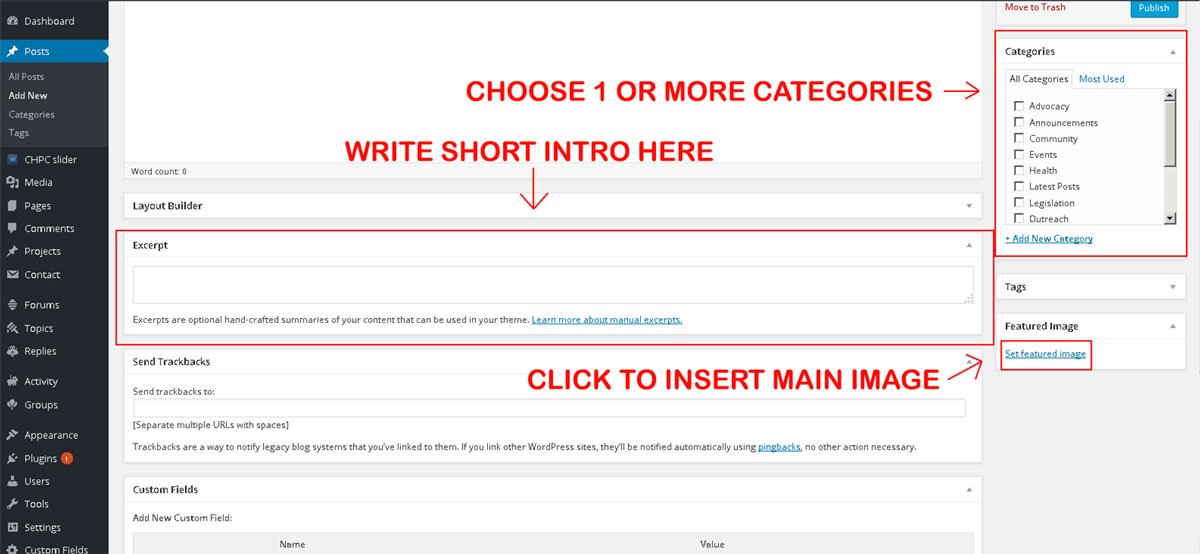
- Check one or more categories in the “categories” section on the right side. Then write a short intro blurb in the Excerpt section that will be displayed on the front (home) page with the featured image. This excerpt could be simply copied from the first 2 or 3 sentences of your article, or you could write a new description. Click the link in the “Featured Image” section on the right to add the main image for your post. This will open the Media Library, where you can add the image, as described next.
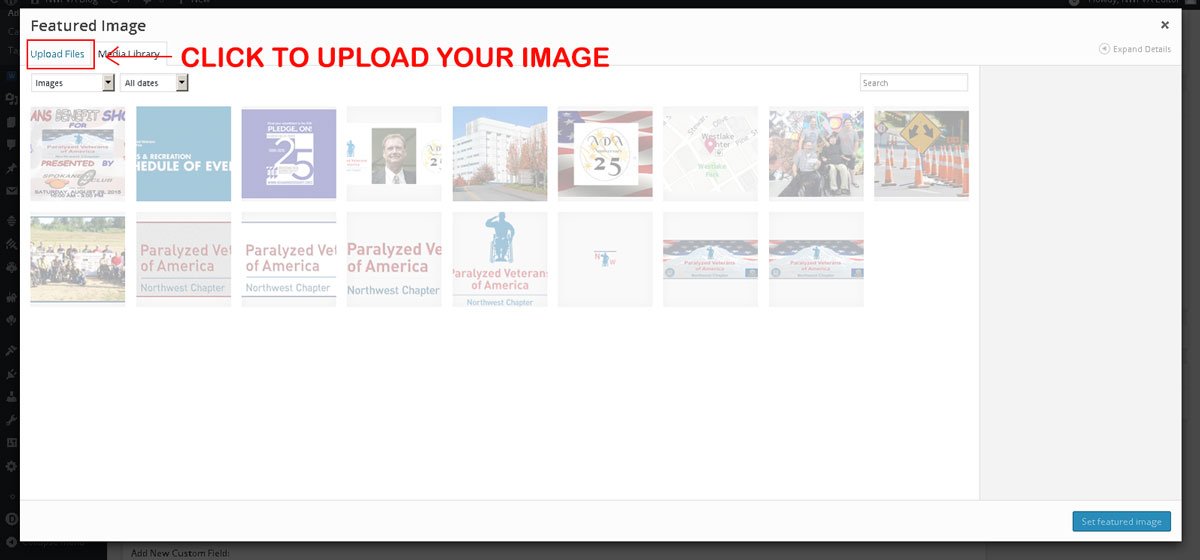
- All of the images and other media used anywhere in the blog are stored here. Click “Add New” to upload a new image from a personal location (computer, drive, etc.) that you would like to use as the Post’s main image.
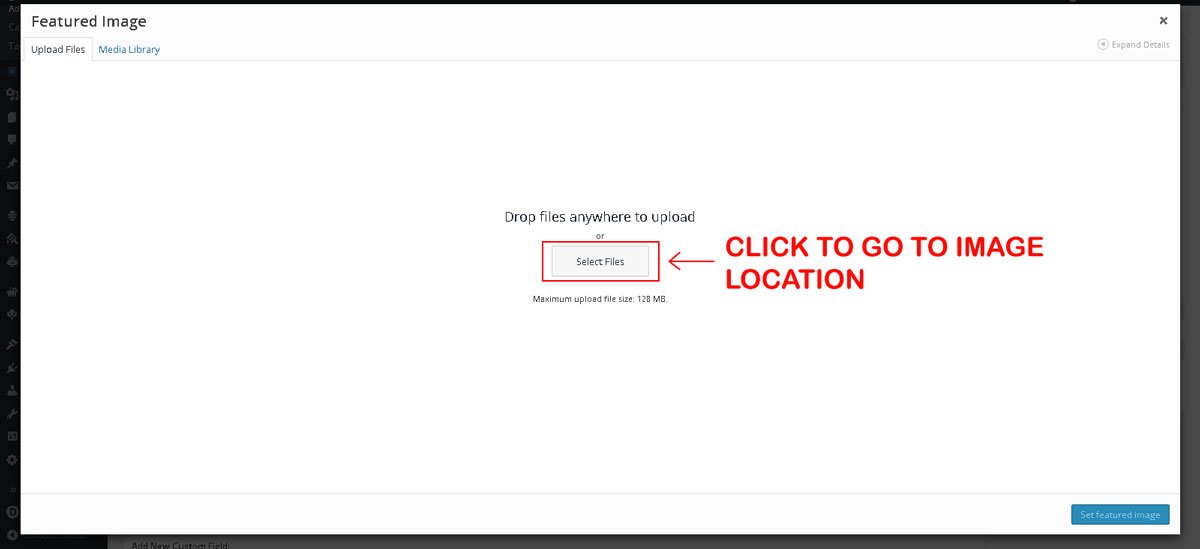
- An almost empty screen with a button in the middle titled, “Select Files” will open. Click that button to browse for the image’s location.
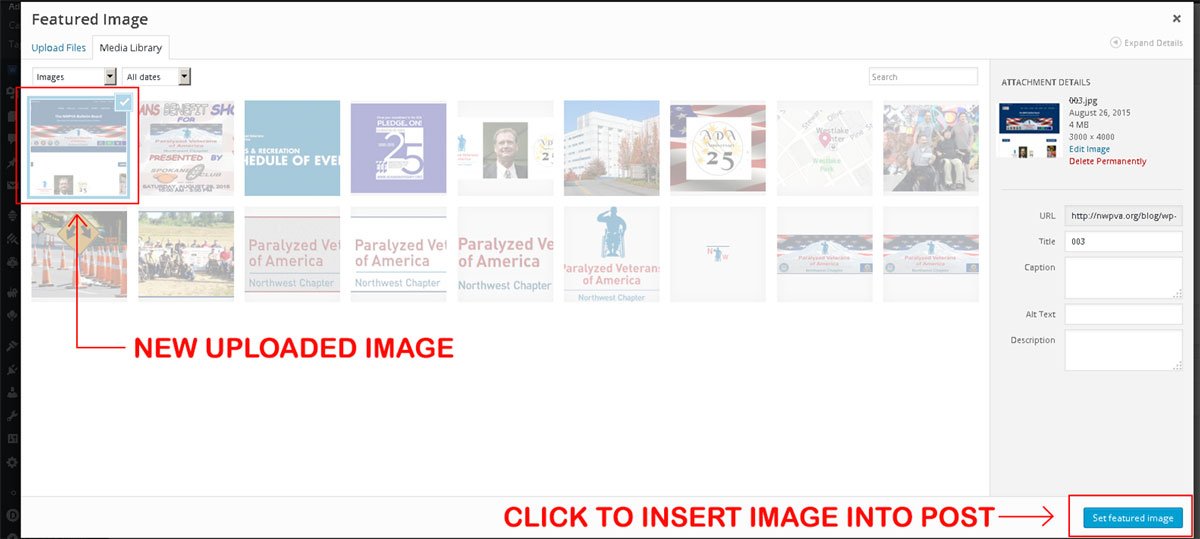
- Follow the prompts to upload your image. Then the Featured Image page will display again, with your new, uploaded image displayed at the left of the top row of images. Click the blue button at the bottom right that says “Set Featured Image” to insert it into the Post page.
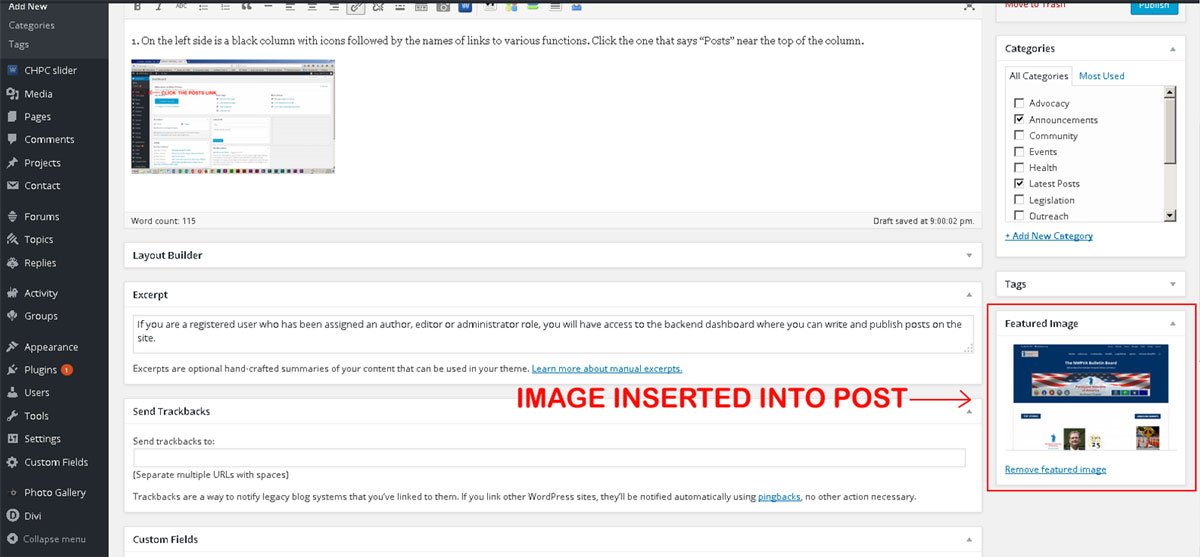
- The Post page will display again with your image now under the “Featured Image” tag, indicating that it has been placed into your Post.
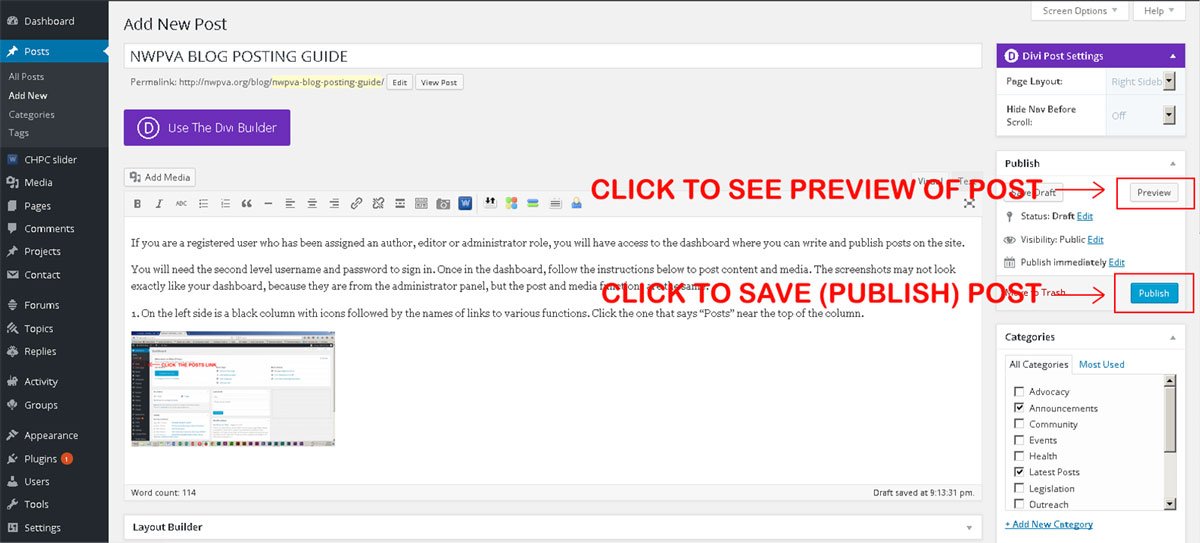
- At the top right of the page are 2 buttons titled, “Preview” and “Publish”. If you click Preview, the page where the post will be displayed opens to show you what it will look like when published. If you click the Publish button, the Post will be saved to the site.
That’s it, all done. Congratulations!